


Delving into the world of personalized craftsmanship, there's a certain allure to the transparency and versatility of acrylic. Whether you're an artist, a hobbyist, or a business owner seeking unique branding solutions, the art of engraving on acrylic opens a canvas of endless possibilities.
In this comprehensive guide, we'll explore how to engrave acrylic, unraveling step-by-step methods, expert tips, and innovative ideas to help you master the art of etching and carving on this translucent medium.

In this article:
Part 1: How to Engrave Clear Acrylic with Diode Laser
Step 1. Gather Essential Tools and Materials:
Before diving into engraving, assemble the necessary tools and materials:
- Clear acrylic sheet
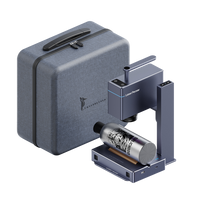
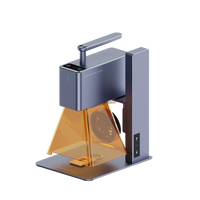
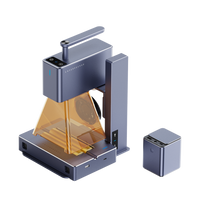
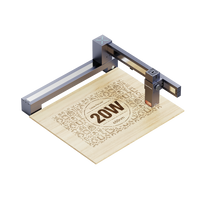
- Diode laser engraving machine
- Design software
- Masking tape
- Protective gear (safety glasses, ventilation if required)
- Cleaning supplies (isopropyl alcohol, microfiber cloth)
Step 2. Prepare Your Design:
Start by creating or selecting a design for engraving. Ensure the artwork is compatible with your design software and is appropriately sized for the acrylic sheet.
Step 3. Set Up the Engraving Machine:
Place the clear acrylic sheet securely within the laser engraving machine. Ensure proper alignment and fixation to prevent movement during the engraving process.
Step 4. Adjust Laser Settings:
Calibrate the diode laser settings based on the type and thickness of the acrylic. Optimal settings may vary depending on the machine and manufacturer. Generally, lower power and higher speed settings work well for clear acrylic engraving.
Step 5. Apply Masking Tape:
Since clear acrylic does not absorb light from a diode laser, to engrave clear acrylic with a diode laser you need to add a mask over it. Since you are using acrylic rather than glass, the type of masking used is more important. Paint strippers commonly used on glass can damage acrylics, making your time and effort a big waste.
Therefore, it is best to use a covering that is easy to remove. For example, tempera paints, dry erase markers, magic markers, sidewalk chalk paints, watercolor paints, and masking tape.
To protect the surface of the acrylic and minimize potential burns or discoloration, apply a layer of masking tape onto the area to be engraved. This can also help reduce the appearance of smoke residue.
Step 6. Test Laser Engrave:
Before engraving the final design, perform a test run on a small corner of the acrylic sheet. This allows you to fine-tune settings and ensure the desired engraving depth and clarity.
Step 7. Start Laser Engraving:
Once satisfied with the test engraving, initiate the engraving process. Begin with the main design, following the paths and intricacies outlined in your artwork.
Step 8. Monitor and Clean as Needed:
Throughout the engraving process, monitor the acrylic to ensure consistent engraving depth and quality. Periodically clean away any debris or residue using isopropyl alcohol and a microfiber cloth.
Step 9. Post-Engraving Care:
After completing the engraving, carefully remove the masking tape. Clean the acrylic surface thoroughly to eliminate any remaining residue or fingerprints, revealing the pristine engraved design.
Step 10. Troubleshooting Common Challenges:
- Inconsistent Engraving Depth: Adjust laser power and speed settings for a more uniform result.
- Residue or Burn Marks: Lower power settings or increase the speed to minimize burning.
- Unwanted Reflections: Experiment with different angles or positions to reduce reflections during engraving.
Expert Tips for Laser Engraving Acrylic:
- Use vector-based designs for sharper and more precise engravings.
- Prioritize ventilation in the engraving area to manage any fumes or odors emitted during the process.
- Experiment with different engraving depths to achieve various visual effects on clear acrylic.
Part 2: How to Engrave Acrylic with Cricut Maker
Step 1. Gather Essential Tools and Materials:
Assemble the necessary tools and materials before starting the engraving process
- Cricut Maker machine
- Cricut engraving tip or compatible engraving tool
- Clear acrylic sheet
- Computer or tablet with Design Space software
- Protective gear (safety glasses, if needed)
Step 2. Prepare Your Design:
Begin by creating or selecting a design for engraving using Cricut's Design Space software. Ensure the artwork is suitable for engraving and adjust the size to fit the acrylic sheet.
Step 3. Secure Acrylic Sheet:
Place the clear acrylic sheet on a clean, flat surface and secure it firmly using painter's tape or another adhesive that won't damage the acrylic's surface. Make sure it's positioned securely within the Cricut Maker's cutting area.
Step 4. Set Up Cricut Maker:
Power on the Cricut Maker machine and load the engraving tip or tool into the designated clamp. Ensure it's properly inserted and secured according to the manufacturer's instructions.
Step 5. Prepare the Design in Design Space:
Upload your chosen design into Cricut's Design Space software. Adjust settings such as size, position, and orientation to fit the acrylic sheet.
Step 6. Set Material and Tool Settings:
In Design Space, specify the material as "Acrylic" and select the appropriate engraving tool settings based on the manufacturer's recommendations for engraving on acrylic.
Step 7. Load Design and Engrave:
Follow the prompts in Design Space to load the design onto the virtual mat and position it accurately on the screen. Then, initiate the engraving process by following the on-screen instructions.
Step 8. Monitor the Engraving Process:
While the Cricut Maker is engraving the design onto the acrylic, keep a close eye on the process to ensure it proceeds smoothly without any issues like slipping or skipping.
Step 9. Post-Engraving Care:
Once the engraving is complete, carefully remove the acrylic sheet from the machine. Clean off any debris or residue left on the acrylic's surface using a gentle cleaner and a soft cloth.
Step 10. Troubleshooting Common Challenges:
- Uneven Engraving Depth: Ensure the acrylic sheet is flat and firmly secured to prevent shifting during the engraving process.
- Inaccurate Design Placement: Double-check the design's position in Design Space and ensure proper alignment on the acrylic sheet before engraving.
Expert Tips for Acrylic Engraving with Cricut Maker:
- Use high-resolution and vector-based designs for crisp and detailed engravings.
- Conduct a test run on a small piece of acrylic to fine-tune settings before engraving the final design.
- Experiment with different engraving depths and speeds for varying visual effects on acrylic.
Part 3: How to Engrave Acrylic by Hand
Step 1. Gather Essential Tools and Materials:
Collect the necessary tools and materials:
- Clear acrylic sheet
- Engraving tool (such as a handheld rotary tool with diamond bitsor a Dremel)
- Masking tape
- Ruler or measuring tool
- Pencil or marker for outlining
- Safety glasses and a well-ventilated workspace
Step 2. Design Planning:
Plan your design on paper or digitally. Ensure the design is suitable for hand engraving and transferable onto the acrylic surface.
Step 3. Prepare the Acrylic Sheet:
Clean the acrylic sheet thoroughly to remove any dust or debris. Apply masking tape to the area to be engraved, creating a visible guideline and protecting the surrounding surface from accidental scratches.
Step 4. Transfer the Design:
Using a ruler and pencil/marker, lightly sketch or trace the design onto the masking tape-covered acrylic surface. This outline will guide your hand engraving.
Step 5. Secure the Acrylic:
Secure the acrylic sheet firmly on a stable surface, ensuring it doesn't move during the engraving process.
Step 6. Begin Hand Engraving:
Start engraving along the outlined design using the handheld rotary tool with a diamond bit or a Dremel. Apply gentle and consistent pressure while moving the tool in smooth, controlled motions.
Step 7. Control Engraving Depth:
Regulate the depth of engraving by adjusting the pressure applied and the speed of the tool. Take your time and work gradually, ensuring uniformity in depth for a clean finish.
Step 8. Clean and Refine:
Periodically stop and clean away debris using a soft brush or cloth to maintain clarity in the engraved lines. Assess your progress and refine details as needed.
Step 9. Post-Engraving Care:
Once the engraving is complete, remove the masking tape carefully. Clean the acrylic surface with a mild cleaner to eliminate any remaining residue and reveal the engraved design.
Step 10. Troubleshooting Common Challenges:
- Uneven Engraving: Ensure consistent pressure and speed throughout the process to maintain uniformity.
- Accidental Slips or Mistakes: Use gentle, controlled movements and take breaks to avoid fatigue, reducing the chance of errors.
Expert Tips for Hand Engraving on Acrylic:
- Experiment with different diamond bit sizes for varying line thicknesses and effects.
- Practice on scrap acrylic pieces to refine your technique before working on your final project.
- Use a light touch and let the tool do the work to prevent accidental slips or damage to the acrylic.
FAQs About Acrylic Engraving
1. What types of engraving tools are suitable for acrylic?
Engraving tools suitable for acrylic include laser engravers (CO2, diode), rotary tools with diamond or carbide bits, CNC routers, and specialized engraving machines compatible with acrylic materials.
2. How do I choose the right engraving depth for acrylic?
The ideal engraving depth for acrylic depends on personal preference and the intended design. Generally, a shallow depth works best for clear visibility without compromising the acrylic's integrity.
3. How can I prevent acrylic from melting or warping during engraving?
To prevent melting or warping, use lower power settings and higher engraving speeds with laser engravers. With handheld tools, maintain consistent movement and pressure without dwelling too long in one area.
4. Can I engrave colored acrylic?
Yes, colored acrylic can be engraved, but the engraved area often reveals the underlying clear acrylic. Designs may appear differently based on the acrylic's color and transparency.
5. Is it possible to engrave mirrored acrylic?
Engraving mirrored acrylic is possible, but it requires careful consideration as the reflective surface might affect the engraving visibility. Test engrave a small area to assess the results before proceeding.
Conclusion
Engraving acrylic demands precision and technique, whether using lasers, handheld tools, or machines like the Cricut Maker. Attention to detail, proper preparation, and understanding the chosen method's nuances are crucial.
Troubleshooting challenges, prioritizing safety, and experimenting with designs contribute to successful results. Mastering acrylic engraving unlocks creative potential for personalization, branding, and unique creations.


